
An effective MVP scoping guide provides a structured process for defining the minimum set of features your product needs to solve a core user problem. It allows you to launch quickly, gather real-world feedback, and validate your business assumptions with minimal investment, de-risking your venture. This guide walks you through the essential steps from defining your problem to creating a documented, actionable scope.
What is MVP Scoping and Why Is It Critical?
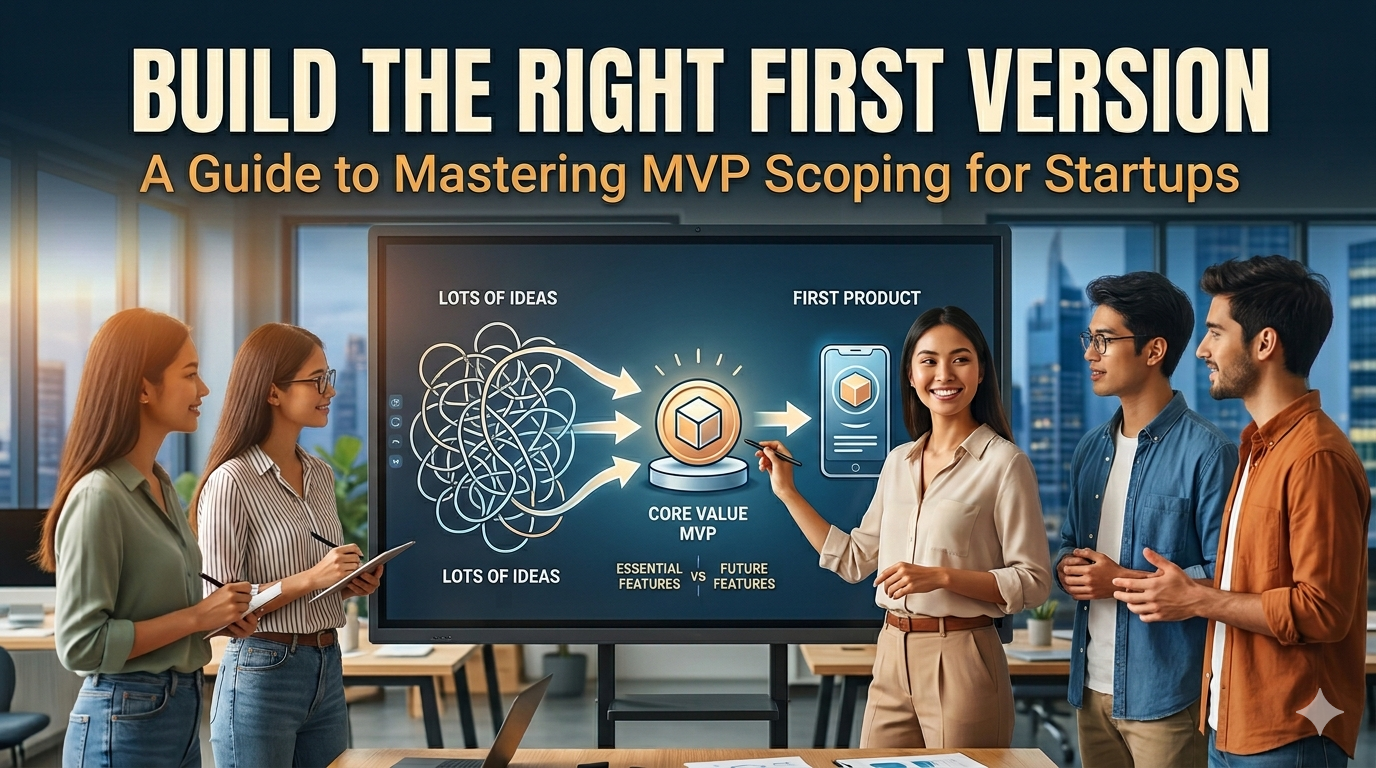
MVP scoping is the process of defining the precise boundaries of a Minimum Viable Product. It's not just about listing features; it's a strategic exercise to determine the smallest possible experiment that can test your core business hypothesis.
Without a rigorous scoping process, projects fall into common traps:
- Scope Creep: The MVP slowly bloats into a full-featured product, delaying launch and draining the budget.
- Building in a Vacuum: The team builds what they think users want, only to find a mismatch with reality after launching.
- Wasted Resources: Time and money are spent on non-essential "nice-to-have" features that don't contribute to the core goal: validated learning.
A tight scope acts as a blueprint that aligns stakeholders, focuses the development team, and provides the fastest path from an idea to a product in users' hands.
Before You Begin: Prerequisites and Tools
To run a successful scoping session, you need to arrive prepared.
Prerequisites:
- A validated business idea with initial market research, including insights from customer interviews or survey data.
- A clearly defined team with a designated product owner or decision-maker empowered to say "no."
- Any existing documentation: pitch decks, user research notes, competitive analysis, or early wireframes.
Essential Tools:
- Collaboration Whiteboard: Miro, FigJam, or a physical whiteboard for in-person sessions.
- Project Management: Jira, Asana, or Trello for tracking features and tasks.
- Documentation: Notion, Confluence, or Google Docs to create the final scope document.
The Step-by-Step MVP Scoping Process
Step 1: Lay the Foundation with Clear Goals and User Focus
Before discussing a single feature, you must establish a shared understanding of what you're building and why. This phase aligns the entire team on the strategic vision.
Define a Crystal-Clear Problem Statement
Articulate the specific user pain point you are solving. Your problem statement is the project's north star. Frame it from the user's perspective.
- Weak: "We need to build a task management platform."
- Strong: "Remote teams struggle to track cross-departmental project dependencies, leading to missed deadlines and confusion."
Establish Your Core Business Goals
Identify 1-3 measurable objectives for the MVP. These business goals will justify every feature decision. Use a simple framework: "Our MVP is successful if we achieve [Metric] within [Timeframe] to validate [Key Assumption]."
- Example 1 (Validation): Convert 5% of free trial users to paid plans in 60 days to validate willingness to pay. Tracking this cohort might involve a simple spreadsheet or a lightweight CRM to manage prospects.
- Example 2 (Engagement): Achieve 100 weekly active users to test a core technical assumption about scalability.
Identify Your Target Users
Create 1-2 detailed user personas for your initial launch. Focus on the early adopter—the user who feels the problem most acutely.
- Example: "Meet Sarah, a 35-year-old marketing manager at a mid-size tech company. She juggles 3-5 campaigns at once using spreadsheets and email and wastes hours each week getting status updates from design and sales."

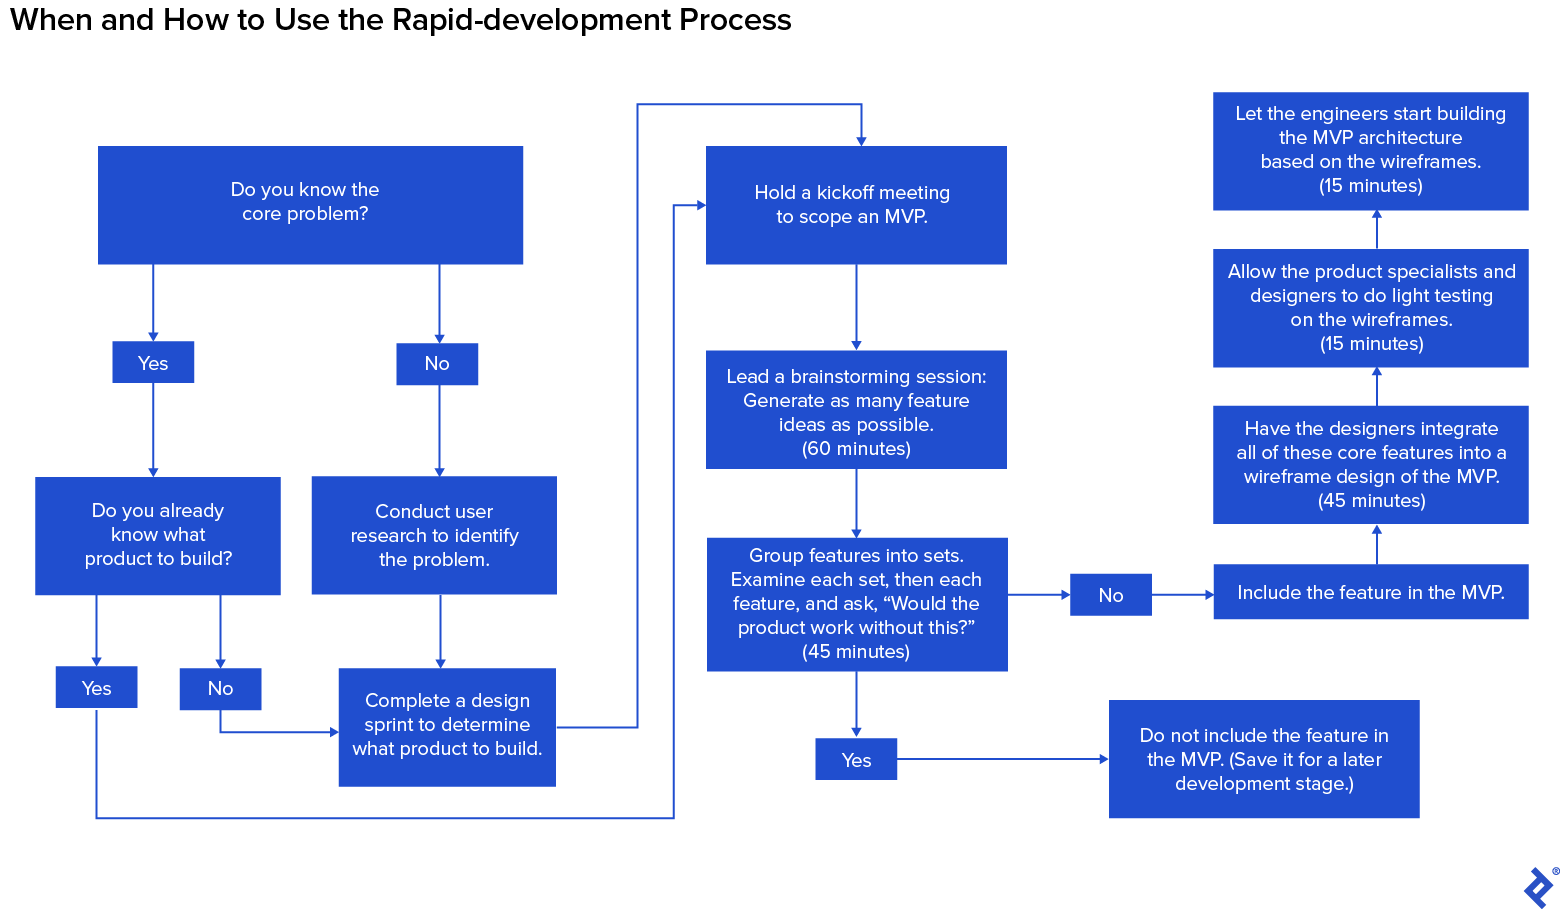
Step 2: Brainstorm and Prioritize Features
With the foundation set, translate your high-level goals into a prioritized list of features. A structured scoping workshop is the most efficient way to achieve this.
Map the User Journey
Use User Story Mapping to visualize the customer's experience from start to finish.
- Create the "Spine": Map out the major activities in the user journey (e.g., Sign Up, Create Project, Invite Team, Assign Task, Mark Complete).
- Brainstorm Tasks: Under each activity, list the specific actions the user needs to complete.
- Write User Stories: Frame actions as stories (e.g., "As a manager, I want to invite my team via email, so that we can collaborate in one place"). This provides context for how each feature fits into the user's workflow.
Ruthlessly Prioritize with a Framework
Use a feature prioritization matrix to separate "must-haves" from "nice-to-haves." This is where you identify your riskiest assumptions and prioritize features that directly test them.
| Framework | How It Works | Best For |
|---|---|---|
| MoSCoW | Categorizes features as Must-have, Should-have, Could-have, or Won't-have. | Gaining quick, high-level alignment on what is essential. It's simple and clearly defines what's out. |
| Impact vs. Effort | Plots features on a 2x2 grid based on their value to the user (Impact) and development complexity (Effort). | Visually identifying quick wins (high impact, low effort) and major projects to tackle first. |
| RICE Scoring | A quantitative method scoring features on Reach, Impact, Confidence, and Effort. | Data-driven teams that need an objective way to compare dissimilar features, removing emotion from the debate. |
Step 3: Define the Core User Flow
A list of features isn't a product. You need to define how users will interact with them to create a cohesive experience.